Monday, September 28, 2015

Sailboats Galore Again!

Yesterday I posted about Fiance and his friends building a boat. Today I'm going to talk about what I wore while they built.

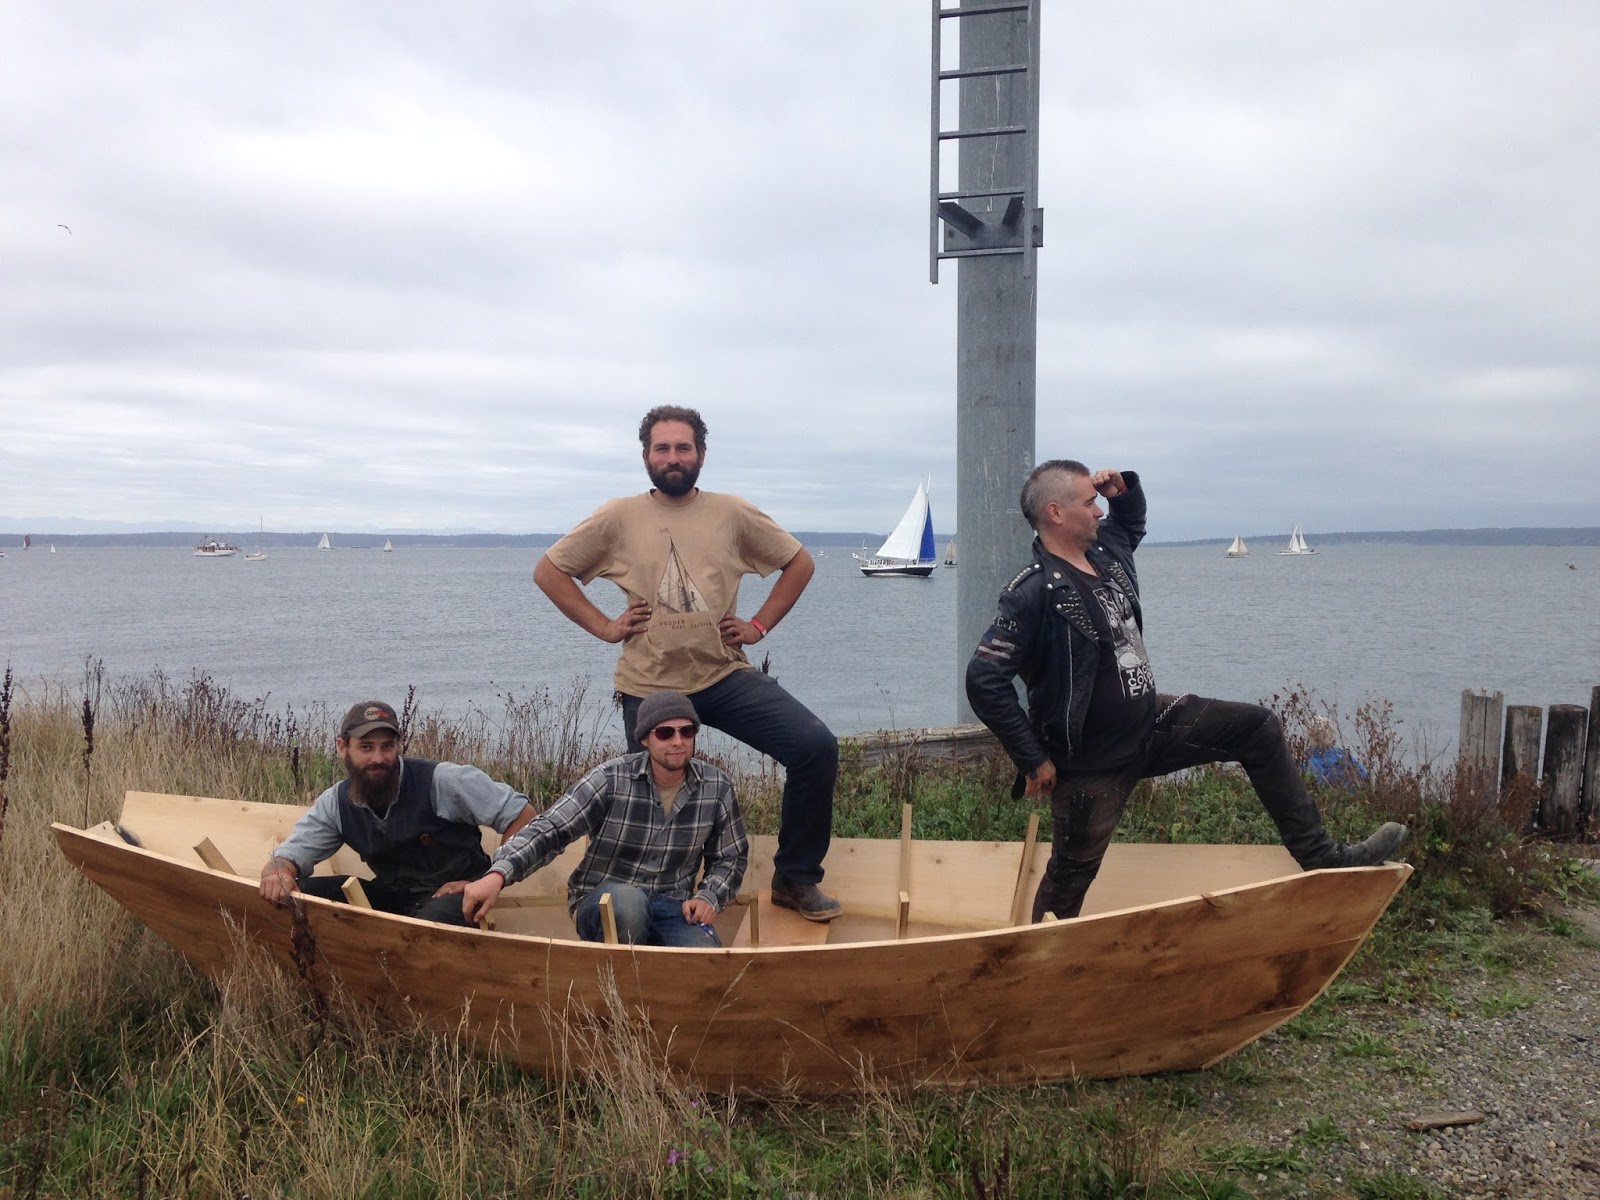
Their competition started on Friday, but I couldn't join them until Saturday because I had to work. So rather than sit at home and just pout that I wasn't with the boys I decided to make myself a new nautical themed dress.

Normally I avoid Simplicity patterns because I always end up swimming in them if I make the size indicated on the package, but they were on sale and I didn't want to spend a lot so I was leafing through the lookbook and I found Simplicity 1080 (I made view A). They called it a "Granny Chic" tunic. I don't really understand why. Maybe because they posed the model holding some yarn? (Let's all try not be offended at yet another implication that knitting/crocheting as a thing only old people do) It certainly doesn't look like anything my grandmother would wear.

So I was looking at the pattern and I spotted something I had never noticed before (probably because it's been so many years since I made a simplicity pattern and when last I looked at them I didn't really understand ease). At the bottom of the envelope was a list of finished garment measurements. And no wonder I always ended up swimming in my finished garments because they give, like, four inches of positive ease. I mean, it's a pull over in a woven fabric, so you need some ease, but four inches seemed truly excessive to me, so instead of making the large the pattern said I needed to accommodate my bust, I went with a medium, and low and behold the fit was perfect!


Here I am in Port Townsend wearing the dress. It was an absolutely beautiful sunny day with tons of adorable sailboats in the water behind me all day, but I couldn't pull Fiance away from his build long enough to take pictures then. So instead you get a gloomy twilight shot with my sweater on because it was cold and windy by that point. (Also, do you recognize the bag? It's the one I talked about in this post. I brought it with me because it was all I had big enough to carry two meals worth of food for four hungry men)


And here is a badly lit shot of the whole dress so you can actually see what it looked like. Isn't that nautical fabric adorable!


The pockets were a huge reason that I picked out this pattern. Normally I'm not a big one for patch pockets, but these were cute and big enough to actually be functional. And most importantly not right over my breasts. I don't understand why designers seem to insist of putting pockets on nipples like I need to be drawing any extra attention to my boobs. Anyway, I'm a sucker for a dress with functional pockets. 


The dress had some interesting construction details. The neck, shoulder, arms and hem were finished with single fold bias tape. I've never used it to finish a hem like this, but I rather liked it for the neck and arms. Next time I think I will skip it in favor of a narrow hem on the bottom because the dress is just wide enough that you need a second package of tape for the last four inches of hem. 


This is also the first pattern I've seen that includes instructions for finished seams. In this case, it called for french seams on the sides. Even if it hadn't I would have done them anyway because I like my clothes nice and neat and finished on the inside, but I liked seeing a pattern that agrees with me.

Another note of interest on the pattern, the pieces were not nested so you had to hunt out the size that you needed for each piece. It certainly made it easier to cut out, but it also makes for a very thick envelope when you are trying to put all the tissue away. 

And last but not least, this dress illustrated the importance of back-tacking. I was tired and in a hurry and I somehow completely forgot to back tack the tucks on the front of the dress, so by the end of the day they had pulled completely out. It's a good thing the back ties were attached first and then hidden by the tuck instead of doing it all in one seam or I would have lost the ties on the dress too. 

If you look closely in the picture you can see the needle holes where the tuck used to be.

I followed those holes to quickly fix the tucks before I washed the dress. It was a bit fiddly to do the second time since the back was attached to the dress now, but I got it and now it is fixed, and back-tacked so it won't be going anywhere a second time. 


Overall I am super pleased with this dress. It's comfy, it fits well and it was really easy to make. I think it only took a couple hours Friday night. Oh, and don't let the thought of turning those long skinny ties turn you off, they are folded lie bias tape and top-stitched, so no turning required! I am totally going to make this pattern again. Next time I think I'll do it in the tunic length. 

Sunday, September 27, 2015

Sailboats Galore!

I know this blog is supposed to be about my fiber-craft related items, but I just have to tell you about some crafting that my Fiance and friends got up to recently. I am so stinking proud of them.

Two weekends ago Fiance and I went to the Port Townsend Wooden Boat Festival. Fiance is an incredibly talented wood worker whose area of expertise is wooden boats. He and three of our friends entered a competition to build a wooden boat in two and a half days. They had from 9:00 to 23:00 Friday and Saturday and from 9:00 until 13:00 Sunday at which time they had to put the boat in the water, put one of them in it and get from the launch point to a designated end spot.

They didn't have to, but in order to further challenge themselves they decided to use only hand tools for their build. This means, no power saws, no electric sanders, no battery operated drills, nothing. Because one of them is a sawyer they also milled all of their lumber themselves before the competition.

I had to work on Friday, so I was only there on Saturday and Sunday, but I took a ton of photos. In the last fives years I've picked up a little bit about Fiance's work, so I tried to act as an intermediary between the boys and the crowd because it took a lot of time for them to stop and answer questions. (which is why I can recite in my sleep that the sides of the boat were Port Orford Cedar, the bottom was Atlis Cedar, the transom and stem were Ash and the side support thingies (not their technical name (I've now been told they are frames)) were Black Locust.)

Here are some pictures of the boys at work. I took around a hundred photos, so here are my absolute favorites:

Our sawyer holding a piece of wood in place (I'm sure he will just love that I shared this photo)

Fiance using a drawknife to shape the stem:


Giving a rough cut to one of the pieces for the bottom:


Attaching the bottom of the boat:


Screwing in the frames:


Fiance making the bench so the rower has a place to sit:


Attaching a piece to the stem:


And posing in their boat after successfully completing the competition: 


They did a wonderful job, and they came in second place! I am super proud of them. 

I wanted to get in on the boat related action, so I made a nautical dress, which I will post about tomorrow.

Wednesday, September 16, 2015

Wedding Garter

Yesterday I talked about what I got Boyfriend for our anniversary. Well, today I'm going to talk about what he got me: an engagement ring! So Boyfriend is actually Fiance now. His gift was far more exciting than a truck bench seat cover. 

We have sort of decided on July for the wedding, so there is really no rush on making anything (but please do look forward to possibly a lot of wedding craft related posts, especially when I start making my dress). 

Even though I knew it was totally pointless and unnecessary when I have so few concrete plans, and so much time to go I wanted to start working on something wedding related, so I decided to crochet a garter. 

My grandmother taught me to crochet before she taught me to knit, so sometime around four or five years old. All I ever managed to make were long chains and triangles. The triangles made great doll clothes, but I never managed to make them that way on purpose, it was always because I was accidentally adding or dropping stitches. So in my head crochet is this tricky thing that I am really rather bad at. So why crochet a garter? Because I'm crazy. 

But much to my surprise it turned out not to be difficult. 

For my first attempt, I used the pattern Bridal Garter by Darlisa Riggs. Although I liked the look of it, it did come out to big, it fits around the very fattest part of my thigh, which is a bit higher than I want to wear it. I'm not super surprised. I used a number 10 crochet thread because it was all I could find, but the pattern called for number 30. I did cast on fewer stitches (is it even called casting on with crochet? I so don't know) but alas, too big. That's okay though. It was great practice and it really boosted my crochet confidence.

In fact, it boosted it to the point where I decided for my second attempt to just make up my own pattern. Yes, I really did go from thinking I didn't really know how to crochet to making up my own pattern and working on a 1.4mm hook.

I'm pretty happy with the finished result. I need some 1/4" ribbon for it, though. And yes, my leg really is that pale,


Here is roughly how I made it:

The lacey bit is in multiples of 8 sts, if you want to make it smaller or bigger

Using number 10 crochet cotton and 1.4mm hook

Ch 160
Join in the round (carefully not to twist it, that took me several tries)
rnds 1-3: sc in each stitch
rnd 4: ch 3 *tr 1 in next sc, ch 1, sk next sc,* repeat to end of rnd
rnds 5-6: sc in each stitch
rnd 7: ch 2, dc in each sc
rnd 8: ch 1, dc 2, *ch 9, sk 3 dc, dc 1 in each of next 5 dc* repeat ending ch 9, sk 3, dc 1 in each of next 2 dc
rnd 9: ch 1, dc 1 in next dc *ch 5, sk 1 dc and 4 ch, dc 1 in next ch, ch 5, sk 4 ch and 1 dc, dc 1 in next 3 dc* repeat ending ch 5 sk 4 ch and 1 dc, dc 1 in next dc, dc 1 in ch
rnd 10: ch5 *sk 1 dc and 5 ch, sc in dc work [ch 5, sc in dc below] 3 times, ch 5 sk 5 ch and 1 dc, dc 1 in next dc, ch 5* repeat ending in ch 5, sk 5 ch and 1 dc, dc 1 in ch
Fasten off.

I really hope that pattern makes sense. Not only have I never written a crochet pattern before I've never even really read one before. I had to look up every abbreviation here. Even with the whole, I have no idea what I'm doing thing, this only took me about five hours to make. And I can't believe that after nearly 20 years of knitting, the first pattern I'm writing down and sharing is crochet!

If you have any questions about the pattern please leave a comment.

Tuesday, September 15, 2015

Truck Bench Seat Cover

As I have mentioned, Boyfriend and I celebrated our five year anniversary recently. We don't normally exchange gifts, but for five years I wanted to give him something. He recently bought a new to him 1970 Chevy Pick Up. I'm sort of in love with this truck. It makes this wonderful deep rumbly sound, like a motorcycle and is a fantastic shade of forest green. I am absolutely sure that he had a lot of other, deeper reasons for selecting this particular truck as his work vehicle, but I don't know anything bout cars, so all I can really say about it is that it is a handsome truck.

Except for the seat.

It had this awful tied in place slip cover that kept falling down to reveal torn up vinyl and foam. It was really nasty.

So for our anniversary I made him a new seat cover.

He wanted something reminiscent of those old Navajo blanket looking seat covers. I found the fabric at Jo-Ann's and thought it was pretty good looking, and as close a match to that idea as I was going to be able to find. I would have liked to try to match patterns, at least on the seat chair and back, but the store only had 3.5 yds of the fabric, and it was a bit expensive (I won't say how much I paid for it because it was a gift). The fabric was 57" wide, and naturally his bench seat is 60" wide, so I had to do some piecing to get it all to fit. I was very nervous as I cut the fabric because I wasn't sure how well I really measured the seat, I've never made a seat cover before and I was pretty much making it up as I went along and I didn't have enough fabric to screw up. 

Well, happily the cover fits perfectly! I think it looks pretty good too. I still need to finish the bottom and reinforce the seams were the seat-belts come out, but Boyfriend says that it is much more comfortable than the old cover, and looks better too. Hurrah!

Friday, September 11, 2015

Bathing Suit

This will be the last Gertie Hirsch pattern for a while, I promise.

I've mentioned a party a couple of times now. It was my five year anniversary (September 1, but we celebrated August 29) and I was hoping for a glorious sunny day, like we've had all summer. Mom and I had planned this big party at her friends absolutely stunningly beautiful house. The house is right on a lake that's warm enough and clean enough to swim in, which is a bit of a rarity for WA. I doubted that I would actually go swimming because I wouldn't want to mess up my hair or make-up, but just in case I wanted a cute swimsuit to wear.

And being as enamored with Gertie Hirsch as I am (have I mentioned yet that I am in no way shape or form affiliated with her, she is totally not paying me to pimp her stuff, I just love her ascetic) I decided to make Butterick 6067. My boyfriend bought me the fabric for the suit from this cool local shop called Seattle Fabrics. They specialize in fabric for outdoor gear, and the associates were very nice and helpful. The fabric is fantastic, nice and heavy not that tissue paper feeling stuff I've seen suits made out of.

And this is were the story takes a turn for the worse. I think I sewed and ripped out this pattern so many times that I probably actually made the suit four times over. I twas horrible. If I had paid for the fabric myself I probably would have just trashed it and given up, but because my boyfriend paid for it I felt a little bit more obligated to make it work.

The upside is that I did end up with a wearable finished product.


The downside is I still may never wear it because the neckline isn't so flattering and it feels like the girls are trying to make a break for freedom out the sides and I don't know how to fix it. 

The best I can think of is to maybe remove the layer of foam interfacing from the bust. I think it's too stiff so rather than conforming to my breasts it's just looking all funky and sort of football shaped. I just don't have the heart to do that yet because it would mean taking it apart for the fifth time. 

One of the other things I didn't like about this pattern was that all of the seams were exposed on the inside, even though it's fully lined. I modified the construction so that it's now as clean and pretty on the inside as it is on the outside. Which isn't very comforting when I don't think I'll wear the suite. 

And it turned out not to matter that the suit didn't look good because it poured rain the entire day of the party and that day was the turning point in the weather because summer seams to be totally over and done here. I guess I've got nine months to futz and see if I can make this wearable. And I do want to fix it because I still think the design is totally adorable. 

Wednesday, September 9, 2015

Party Dress!

Another Gertie Hirsch pattern coming at you, this time number 5882 I fell in love with the pattern when I saw it in the Butterick look-book but I did not think it would be flattering on my double Ds. However I was reading Gertie's Blog for Better Sewing and she had a post on how this shelf bust can actually be flattering on larger breasts because it cuts across the breast instead of underneath it and thus serves to visually minimize the bust. I was almost convinced with that post, but then she followed it up with a tutorial on how to do a full-bust alteration(FBA) and I was sold.

This dress was my first attempt at a FBA and it was easier than I thought it would be. I made a muslin, but of course I didn't take any pictures of it. I ended up with the right amount of fabric for the bust, but when I tried it on initially the side seams were sitting at an angle rather then nice and vertical. What I ended up having to do was add two inches to the front of the dress and take away those two inches in the back so that my seams all angled the right ways (or rather, didn't angle). I am totally kicking myself for not taking pictures of that process.

Here is the first picture I took, of the bodice almost full assembled.

Bodice boned, but not lined, and attached to the skirt, but I don't think the straps were attached yet and the skirt was not yet hemmed. 


And here it is, fully assembled and not so flattering looking on the hanger, but as I hope you can tell from the above picture it ended up fitting pretty well (especially with a strapless bra, unlike in the above photo were my strap is totally showing). I actually took this picture after the party, so the dress is kind of wrinkly. Oh well.

I really only got one good action shot of the dress at the party. Mom and I were both so busy having fun that we sort of forgot about that whole taking pictures thing. So, here I am with my grandfather and my "little" brother. I have to say, when I was making the dress and trying it on I did think it was very flattering from the front, but from the side it is not visually minimizing my bust line. 


One of the things that I do want to note is that the straps are cut on the bias, I think they have to be in order to curve around the bust detail like that, but that also meant that when I hung the dress to let the bias on the skirt hang out before hemming the straps also stretched and sort of twisted a little bit, which I wasn't very happy about. 

I love the hem of this dress though. I used horsehair braid (again following a tutorial from Gertie's Blog). I had never used it before and now I am totally in love with the stuff. It won't give you petticoat type volume, but it did make my skirt stand out just a bit and made it delightfully swishy. It almost made for a very clean, very pretty looking hem. I am totally in love and want to use it in all of the things now. 

And one last point of love with this pattern is that it is fully lined, so everything on the inside is nice and neat and clean looking. I used cotton batiste for the lining and plain old cotton for the dress. 

Monday, September 7, 2015

"Retro" cherry shirt

I've said it before and I'll say it again, I love Gertie Hirsch's patterns. I'm just warning you now that the next three posts will all be about her designs. I'm going to start with Butterick 6217 because I modified it the least.

I fell in love with this shirt for the neckline and the sleeves.


Aren't those sleeves awesome?!?

(also, please ignore how filthy my mirror is, there is a bunch of construction going on in the apartment and the plaster dust just keeps reappearing no matter how much I clean)


The only change I made to the pattern was the leave off the big bow thing that went over the front. I feel like my girls are big enough without adding any extra frufru. Also I didn't have enough fabric. That cherry fabric shrank like crazy in the wash, I should have bought an extra 1/4 yd. 

Speaking of, how cute is the cherry fabric? I felt like the shirt had a vaguely retro feel, like most of Gertie's patterns do, so I wanted to play it up with a rockabillyish fabric. 

I will say, there is something a bit funny in the fit of the shirt, but I can't put my finger on what it is exactly or how to fix it. I've been reassured that it looks fine. My mom even said that if she didn't know that you can't buy shirts with cherries on them at the mall she would never have guessed I made the shirt. So I would give this shirt four out of five stars. It's not perfect, but I like it and I will totally wear it.

Thursday, September 3, 2015

Tatted Handkerchief Edges

Man, I have been distracted the last two weeks. I had a big party for my fifth anniversary and I will write posts about what I made for it, but I haven't taken any photos yet because my mom and I were so busy having fun at the party that we forgot to take any photos. Oops.

In the mean time, I finished a tatted hanky edge a while back, and I'm almost done with another, so I thought I would throw up some pictures of those.

With this one I was practising rings, and reversing my work. It's a pretty simple pattern, 3ds p 3ds p 3ds for both the rings and the chains.


And here is a close-up of the corner of my current project. It's the same pattern as the last handkerchief, but this time I learned how to join the picots in the rings. It's just one tiny difference, but the whole thing looks prettier, flatter, and somehow more finished. I've just got one last edge to go on it and then I'll put up the finished picture. 


I think my favorite thing about both of these edges was putting the ring on the corner. It looks really pretty, if I do say so myself.