Lest you run away with the idea that I actually know what I am doing, let me tell you about my week.
I used to have a beautiful silk organza petticoat. I put it in the back of my closet to save for my wedding day. Unbeknownst to me the back wall of my closet was growing mold and now so was my petticoat. After a great deal of frustrated cursing and even a few tears I decided to make a new petticoat. A fluffier petticoat. A nylon petticoat. A much, much cheaper petticoat.
Well, now I have learned why people buy petticoats because gathering all of that tulle is a pain in the rear. First, I miscalculated how much tulle I needed and had to go get more. Then I bought the wrong shade of blue because it looked like the color matched in the store but in sunlight it so totally doesn't match. Cutting it into strips wasn't as bad as it could have been thanks to my rotary cutter and mat. But silly me, I thought I could just use my ruffler foot to gather the 213 yds of tulle. Yeah, ruffler feet and tulle do not like each other. So then I thought, fine, I can gather it by hand. I got 1/8 of the way through a 16 yd strip and realized that was not a great plan either.
So, tomorrow I will work on the petticoat some more. I think I'm going to try and work in smaller, more manageable chunks, then put it all together, instead of trying to gather the horribly long strips. If I get it to work I will be sure to share with y'all how I do it.
I feel like I have nothing to show for this weekend, and I'm having to repeatedly remind myself that that isn't true. I made more paper flowers, I addressed all of my invitations (I forgot to buy stamps though) and I got half way through a new wedding garter because upon further consideration the shade of blue for the first one just wasn't right. But it took me three tries to get it joined in the round without twisting.
Yeah. I'm a bit frustrated right now. But tomorrow is a new day, I have a new game plan, things will get better.
Sunday, April 10, 2016

Sunday, April 3, 2016
Sweater Seams
I didn't post on Saturday because I thought I had nothing to say. I have actually caught the blog up with all of my finished objects. Last night a friend and fellow blogger came over for dinner and I was lamenting my lack of post ideas. She astutely observed that I can talk about projects before they are finished. She even pointed out that people might be more interested in how I make things rather than just seeing what I've made.
And so, without further ado, I present a sweater in progress.


And once again, just keep sewing. This is really the place that you want to be patient. Don't work on seaming if you are in a hurry.


And so, without further ado, I present a sweater in progress.

My sweater only needs one more sleeve. Tragically that half a ball of yarn where the other sleeve should be is all that I have left, and it's not going to be enough to finish the sleeve, so now I am sort of on hold until I can get another ball.
But in the mean time I thought I could talk about seaming a sweater. I firmly believe that the finishing work on a sweater is what makes the difference between being hand-made versus home-made.
I like to do the finishing work as I go for a variety of reasons. 1) weaving in the ends of one sleeve isn't nearly as arduous and weaving in the ends on an entire sweater. (Let's be real, we all know at least one knitter who could have a beautiful finished object who just never bothered to weave in the ends.) 2) Sewing together the peices of the sweater as I go allows me to check fit before everything is done. Before I knit this sleeve I knew my sweater would fit because I had already sewed together the front and back and tried it on. 3) If it doesn't fit it allows me to make changes without having to frog the whole thing.

So, after I weave in the ends of my sleeve I start sewing up the long straight seam. Most tutorials on seaming recommend sewing the shoulder seams of a sweater, then sewing the sleeve cap, and finally treating the side seam and sleeve as one long seam. I don't like doing that because it means I have to have everything done before I can do any seaming.
When I sew my seams I work with the right side visible, that way I can see what my finished seam will look like and fix any icky spots.
Use your needle to pick up two of the bars between stitches on one side of the fabric.

Then pick up two bars on the other side of the fabric. This is easier to do if you use both hands, instead of taking a picture with one hand.

Pull your thread tight between stitches.This is where working from the right side really helps because you can control the tension of your seam more easily when you can see it. You really don't want to pull the seam too tight or leave it too loose; just like when you are trying to get a good, even, tension while knitting.

Because I'm sewing the side seam before doing the sleeve cap I don't want to sew it up all the way, instead I stop a couple inches before the sleeve cap shaping, then I jump to my sleeve cap. When working the cap always start in the middle of the cap and work your way down to the armpit, then go back up and do the other side. This helps keep everything nice and even.

Sewing the sleeve cap is a little trickier than the side seams because you don't have the same directionality on all your stitches. Instead of picking up the bars between stitches on your sleeve you will be inserting your needle underneath a stitch.

On the body of the sweater you are still picking up the bars.

And once again, just keep sewing. This is really the place that you want to be patient. Don't work on seaming if you are in a hurry.

Sew all the way down to the armpit join.

Then go back to the top and work your way down the other side. When it's all done you won't be able to tell that your seam was done in pieces. In the picture below my needle is pointing to my starting spot.

Once your sleeve cap is done, go back and finish your side seam. Everything should line up nice and neatly, but sometimes you end up having to ease in a couple of stitches. If you are off by a stitch or two, I wouldn't worry, but if you end up off by inches I would take the seam apart and start again.
And this is what your seams should look like on the inside. Aren't they nice and neat?

Some sweater patterns will use a two stitch selvedge, the pattern I'm working with here only used one. Some don't include one at all and you will need to add it yourself. Make sure that you check your pattern before your begin, especially if your pattern includes ribbing because you want your ribbing to line up correctly like mine does on the sleeve.

I love nice neat seams. I think learning to seam my sweaters correctly made the single biggest difference in my knitting. If finishing is something that you struggle with I would highly recommend Deborah Newton's book Finishing School: A Masterclass for Knitters.
Tuesday, March 29, 2016
Sometimes the Fabric Speaks
On Saturday I made an a-line skirt. I ended up having to draft the pattern for it myself because when I looked through my stash of patterns every skirt that I had was very full, but the flower pattern on my fabric had really clear verticle directionality that just wouldn't work with a circle skirt, at some point somewhere on the skirt I would have ended up with sideways flowers. It's hard to see in the picture, but the flowers all have stems.
I'm glad that I realized that before I started cutting out skirt pieces.
I was going to write something up about how I drafted the pattern, but I forgot to take pictures of that part of the process. The skirt was pretty simple, basically just the front and two back pieces. I made a facing, rather than do a waistband. I used french seams on the side seams and a clean seam for the back seam with the zipper. Because I drafted it myself I gave myself very generous seam allowances, The back I used a 1" SA so I could turn over the edge of the fabric and still have plenty to work with while sewing in the zipper.
I did end up having to finagle the fit a little at the end, it was good through the hips, but a little loose at the waist. Either my math was bad, or my measurement. I'm not sure which.

I'm glad that I realized that before I started cutting out skirt pieces.
I was going to write something up about how I drafted the pattern, but I forgot to take pictures of that part of the process. The skirt was pretty simple, basically just the front and two back pieces. I made a facing, rather than do a waistband. I used french seams on the side seams and a clean seam for the back seam with the zipper. Because I drafted it myself I gave myself very generous seam allowances, The back I used a 1" SA so I could turn over the edge of the fabric and still have plenty to work with while sewing in the zipper.
I did end up having to finagle the fit a little at the end, it was good through the hips, but a little loose at the waist. Either my math was bad, or my measurement. I'm not sure which.

All in all, I am really pleased with my finished skirt.
I had a heck of a time taking pictures though because it was super windy.
Also, I love this outfit, everything I am wearing here I made myself, and that is a really incredible feeling. I talked about the sweater here, the collared shirt here, and the cami under that shirt here. I'm also wearing a rayon slip that I know I made within the last year, but that I apparently never bothered to write about, so it looks like I've got another post about my underwear coming up.
Saturday, March 26, 2016
Bird Dress
I think my hero worship of Gertie Hirsch is pretty well established at this point seeing as I've written about her at least four other times on this blog. I bought her newest book, Gertie's Ultimate Dress Book* the day it came out and spent a happy few days reading it cover to cover and picking out pattern pieces. I absolutely love that the skirts, bodices, and sleeves are interchangeable so you can mix and match to get way more than the 23 styles that she features. Although I don't love every dress in the book I do like most of them. When I bought the book I didn't know what dress I was going to make first, but I did know what fabric I was going to use.
Back in November, I bought a pretty quilters cotton with a surprisingly soft hand and good drape featuring a blue background and stylized birds. I originally thought I would use it to make a skirt, but then it came time to move and in the chaos, I never got around to using the cotton. Later I decided to make a dress instead, but I didn't want an all over pattern of the birds because the fabric had a distinct horizontal stripe and I didn't think it would look good in a bodice so I picked up a yard of plain light blue cotton and 5 yds of navy blue piping. Then the fabric sat for another month.
Finally, this week I made myself a dress.




Back in November, I bought a pretty quilters cotton with a surprisingly soft hand and good drape featuring a blue background and stylized birds. I originally thought I would use it to make a skirt, but then it came time to move and in the chaos, I never got around to using the cotton. Later I decided to make a dress instead, but I didn't want an all over pattern of the birds because the fabric had a distinct horizontal stripe and I didn't think it would look good in a bodice so I picked up a yard of plain light blue cotton and 5 yds of navy blue piping. Then the fabric sat for another month.
Finally, this week I made myself a dress.

I was going to make the Floral Surplice Dress, but the pleated skirt that it called for would have had my birds sitting sideways, which would have just looked wrong. So instead I used the Surplice Bodice and the All Around Pleated Skirt - basically more like the Floral Chiffon Dress, but I left off the cap sleeves. I added pockets because it's me and I will always add pockets.

Yay pockets!
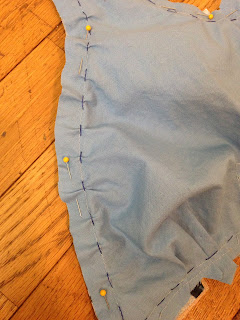
One of the big challenges of this dress was the piping that I used to outline each section of the dress. I love the finished look, but I had a heck of a time sewing it in place because it was smaller than my seam allowance so it was invisible once it was sandwiched between pattern pieces. I have no idea if there is a "right" way to sew in piping, but what I did was machine baste a line on each dress piece at 5/8" then I hand basted the piping to that line. Then when I sewed the pieces together I sewed over that line again so that my piping was exactly where it was supposed to be.

This technique actually ended up helping me fit the bodice too. When I made a muslin of the bodice I noticed a couple of fit issues. Not surprising seeing as Gertie even warns that for those over a C cup an FBA will probably be required. I didn't have to make major modifications, but I did have some gaping at the neckline. I solved that by making small tucks along the neckline while I was hand basting the piping.

From the front, the tucks are nearly invisible and now my bodice sits nice and snug to my chest.
The other fit problem I corrected was the bottom edge of the midriff piece. The pattern nips in pretty sharply at the waist, but my actual waist is straighter than that so I drew a new line from the armpit of the back boatneck bodice and the front surplice bodices pieces down to the bottom of the front and back midriff pieces so I could smoothly add the extra 3/8" that I needed on the bottom edge of each piece. Because the skirt pieces are pleated I didn't add anything to them, I just adjusted the pleats until everything lined up correctly.
One thing I wish I had done was make the arms a bit bigger, they are a little snug under my armpit. I didn't notice on the muslin, but I do on the finished piece, which makes me wonder if it has something to do with the piping. It doesn't bother me enough to try and fix it on the dress, but I will keep it in mind when I make another dress out of this book (and yes, I am totally already thinking of the next couple of dresses I'm going to make).
Another change that I made was to line the midriff. The Floral Surplice Dress uses a facing instead of lining the bodice. I am so used to lining the bodices of dresses that I forgot about finishing the seams (which was totally dumb on my part because Gertie talks about seam finishes and lining versus facing in earlier chapters of the book and reminds you to finish your seams in the instructions). I was super bothered by the unfinished seams and didn't want to try and pink them because of the piping caught in them, so I partially lined instead, and in the future, I will stick to fully lining my dress bodices.

One last note: I did not bother trying to perfectly match the patterns for the skirt side seams, but I did line up the branches that the birds are sitting on. The first time I cut out the back skirt pieces I didn't think about the pattern until I laid it next to the front skirt piece and realized it was off. So I cut my pockets and front facing from the skirt back and recut the skirt. I am glad I took the time to do so because I would have just been driven batty if I had sewed them together and the pattern didn't flow.

All in all, I am really happy with this dress, and I cannot wait to make more dresses from Gertie's Ultimate Dress book. I think I am going to make the Blue Wool Work Dress next.
*P.S. I am totally not getting paid to promote Gertie Hirsch, her book, her patterns, or her blog. I just think she is rad and I totally want to be like her when I grow up. :)
Saturday, March 19, 2016
Strawberry Curtains
My grandmother passed away in April of 2014. She taught me how to knit and continually inspired me to keep at my other fiber related passions. She was also a great sewer and quilter. When she passed I got one of her sewing machines and I've been happily sewing on it since then. I also got first dibs of going through her stash. Grandma was not the fiber snob that I am, and she had very difference taste in colors than me, but I still managed to bring two large totes worth of fabric home with me. One of the fabrics that I picked out was an adorable vintage cotton with strawberries and leaves printed on it. I picked it out intending to make kitchen curtains out of it, for like a hot minute when I saw the yardage I had visions of a full skirted 50s style dress, but common sense prevailed and I made curtains.
I faced several challenges while designing my curtains. The first was that my lease states that I cannot hang curtain rods. Fortunately, my windows have nice deep frames so using a pressure rod instead is not a problem, but it does sort of dictate the look of the curtains.
Secondly, my windows are relatively small, 41"x45" on the inside of the frame. Because I can't use curtain rods I can't use curtains to visually change the size of the window, so I needed a curtain design that wouldn't visually overwhelm the window.
Thirdly my strawberry fabric is only 36" wide, but the muslin that I was using to line it (also out of my stash) was the now more common 44" wide. I let the strawberry fabric dictate the width of my curtains, and got a little creative with the lining on the back, working on the basis that I'll never really have to look at the back of the curtains.
I decided to let the width of my fabric largely dictate the design. Because it's so narrow I didn't want to make two panels of curtains, I felt the window would end up looking overwhelmed. So I cut three panels of my strawberry fabric 50" long and sewed them together with a 1/2" seam allowance to get one panel 106" wide by 50" long. My mom taught me that curtains should be between two to three times the width of the window. Twice the width can look a little bare, but three times can be overwhelming on narrower windows. My curtains are almost exactly 2.5 times the width of the window.


Next, I cut two more rectangles from the strawberry fabric, this time 6"x36" to act as ties for the curtains.


I faced several challenges while designing my curtains. The first was that my lease states that I cannot hang curtain rods. Fortunately, my windows have nice deep frames so using a pressure rod instead is not a problem, but it does sort of dictate the look of the curtains.
Secondly, my windows are relatively small, 41"x45" on the inside of the frame. Because I can't use curtain rods I can't use curtains to visually change the size of the window, so I needed a curtain design that wouldn't visually overwhelm the window.
Thirdly my strawberry fabric is only 36" wide, but the muslin that I was using to line it (also out of my stash) was the now more common 44" wide. I let the strawberry fabric dictate the width of my curtains, and got a little creative with the lining on the back, working on the basis that I'll never really have to look at the back of the curtains.
I decided to let the width of my fabric largely dictate the design. Because it's so narrow I didn't want to make two panels of curtains, I felt the window would end up looking overwhelmed. So I cut three panels of my strawberry fabric 50" long and sewed them together with a 1/2" seam allowance to get one panel 106" wide by 50" long. My mom taught me that curtains should be between two to three times the width of the window. Twice the width can look a little bare, but three times can be overwhelming on narrower windows. My curtains are almost exactly 2.5 times the width of the window.

Isn't the fabric cute? Anyway, then needed to make a lining so I cut two 44"x50" panels out of the muslin, then one 19"x50" piece, then I had to sort of piece together the remaining muslin to get a second 19"50" piece. I then sewed all of those together to get a second rectangle 106" wide.
From the right side, I don't think my Frankenstiened lining is that noticeable, and when it's hung no one can see it.

Then I put my fabrics right side together and sewed around the right, bottom, and left sides, leaving the top of the curtains open. I turned the fabric right side out and very carefully pressed the edges. I used a knitting needle to poke out the corners to get them nice and square. I wanted to make sure that only the strawberry fabric was visible from the right side so I actually turned it about 1/16" in towards the back, instead of trying to press right down the middle of the seam.
So when I top-stitched the edges from the wrong side you can see just a little bit of the strawberry fabric.

And from the right side you can't see the lining at all.

Then I sewed the curtain rod pocket. To do that I turned down and pressed about 1/2" of the top, then I turned it over and pressed down about 2.5" and sewed the channel.


Next, I cut two more rectangles from the strawberry fabric, this time 6"x36" to act as ties for the curtains.

Because I chose to make only one panel instead of two, but I also like symmetry, I decided to attach the ties to the top of the curtain and use the to tie the curtain up instead of to the left or right.
I sewed the rectangles into a tube using a 1/2" seam allowance, turned it right side out and pressed it. I chose to press the seam to the center instead of the side so it would look prettier from the front.

I then top-stitched all the way around and sewed a buttonhole on one side of each of them and sewed the button to the other. The cute pink buttons also came from my grandmother's stash.

I carefully centered the ties over the two seams on the front of the curtains from sewing my original panels together, then I sewed the tie down following the stitched from sewing the curtain rod pocket. Had I thought about it in advance I think I would have sewed the ties on at the same time I made the pocket, but I was careful enough that I think you have to be looking closely to see where the doubled stitching is.

I think it drapes beautifully when hung, and the button is a cute, subtle detail.

And here is my finished curtain, hung in the window and looking rather adorable if I do say so myself.

I am really happy with the final product. The red in it goes well with all the other red accents in my kitchen without being too overwhelming. I think it makes my kitchen look more "finished" and because the fabric was all out of my grandmother's stash it didn't cost me a dime, and now I will think of her whenever I look at my window. It sure beats our charming view of the parking lot.
Wednesday, March 16, 2016
Fiance's Flannel Shirt
I thought today I would take a break from home decor projects and share a shirt I recently made for Fiance.


It fits him really well, but he hates having his picture taken, so I elected to model it instead. It's a bit long on me, but it has that comfy wearing my boyfriend's shirt feeling. I like it so much I might make myself one too! When he put it on he pointed out that the pockets are not level, but they really aren't off by much. Oops. I probably should have measured before I sewed them on, instead of eyeballing the marks on the pattern.
The pattern is Negroni by Colette Patterns. I really enjoyed making it. The instructions were easy to follow and they actually tell you how to make a fully finished garment, which I appreciate. The pattern uses flat fell seams. I did make one modification, They call for a 3/8" seam allowance on the shoulders, but I used 5/8". I though the stitching on the flat fell looked prettier that way, it seemed disproportionate at only 3/8" and Fiance has fairly narrow shoulders, so the extra 1/4" on each shoulder wasn't detrimental to the final fit.
The only other change I would make is to the buttons. I think it would look much more handsome with 7 buttons placed closer together, instead of the 5 that it called for. I also wouldn't place the buttonholes so far in on the facing, just because I think it looks a little funny. All in all, I like this pattern very much, and I'm pretty sure I will be using it for more flannel shirts in the future.
Sunday, March 13, 2016
Fabric Pouf
All right y'all, let's just all agree to pretend today is Saturday and that I followed through on writing at least one post on time this week.
So, as promised, here is my post about the fabric pouf that I made a couple weeks ago. I used this pattern from HGTV. It was pretty easy to follow and the whole shebang took less time than a load of laundry (I know this because I started a load of laundry shortly before cutting out the fabric).
I will say that it made me really love my rotary cutter. After I printed out the pattern and taped it together I folded my 2 yds of canvas into eighth and cut out all of the pieces at once. I could not have done that if I was using even the sharpest sewing shears.


So, as promised, here is my post about the fabric pouf that I made a couple weeks ago. I used this pattern from HGTV. It was pretty easy to follow and the whole shebang took less time than a load of laundry (I know this because I started a load of laundry shortly before cutting out the fabric).
I will say that it made me really love my rotary cutter. After I printed out the pattern and taped it together I folded my 2 yds of canvas into eighth and cut out all of the pieces at once. I could not have done that if I was using even the sharpest sewing shears.

Then I sewed the pieces together, except for one section of one side, flipped it inside out, and stuffed it. The pattern called for 1/4" seam allowances, and if I made this again I would change that to 1/2" just because this pouf is going to see a lot of hard use and I don't think 1/4" gives enough strength to the seam. In fact, after just a couple of weeks, there is at least one spot that I need to repair already because of raveling.
I also ignored the portion of the directions where if said to use 10 to 15 old towels to stuff it, because seriously who has 10 to 15 old towels just laying around. I don't think I've even owned that many towels over the course of my life, much less kept them when they got to gross to use any more. I used two 32 oz packages of fiber fill instead.
And then I used the ladder stitch to sew the opening shut.

It looked all nice and neat at the side when I was done, but I stitched the bottom really ugly because I wanted to know it wasn't going anywhere on me.

Then I flipped it over to hid my ugly stitches and wah-lah! Now I have an ottoman.

I totally love the pattern on this fabric, it manages to be bright and bold and earthy all at once. It looks good with the chairs we currently have and will also work with the couch that Fiance and I are going to make. I used a treated canvas, and for once I'm really glad that I didn't wash the treatment off because I spilled coffee on the pouf, but it just beaded up and I was able to pat it off with a rag, no harm, no foul. I feel like this sucker is going to last us a good long while, and I'm really glad at the end of my work day to have somewhere to put my feet up. And it was way cheaper that buying something ready made would have been. Yay!
Subscribe to:
Posts (Atom)